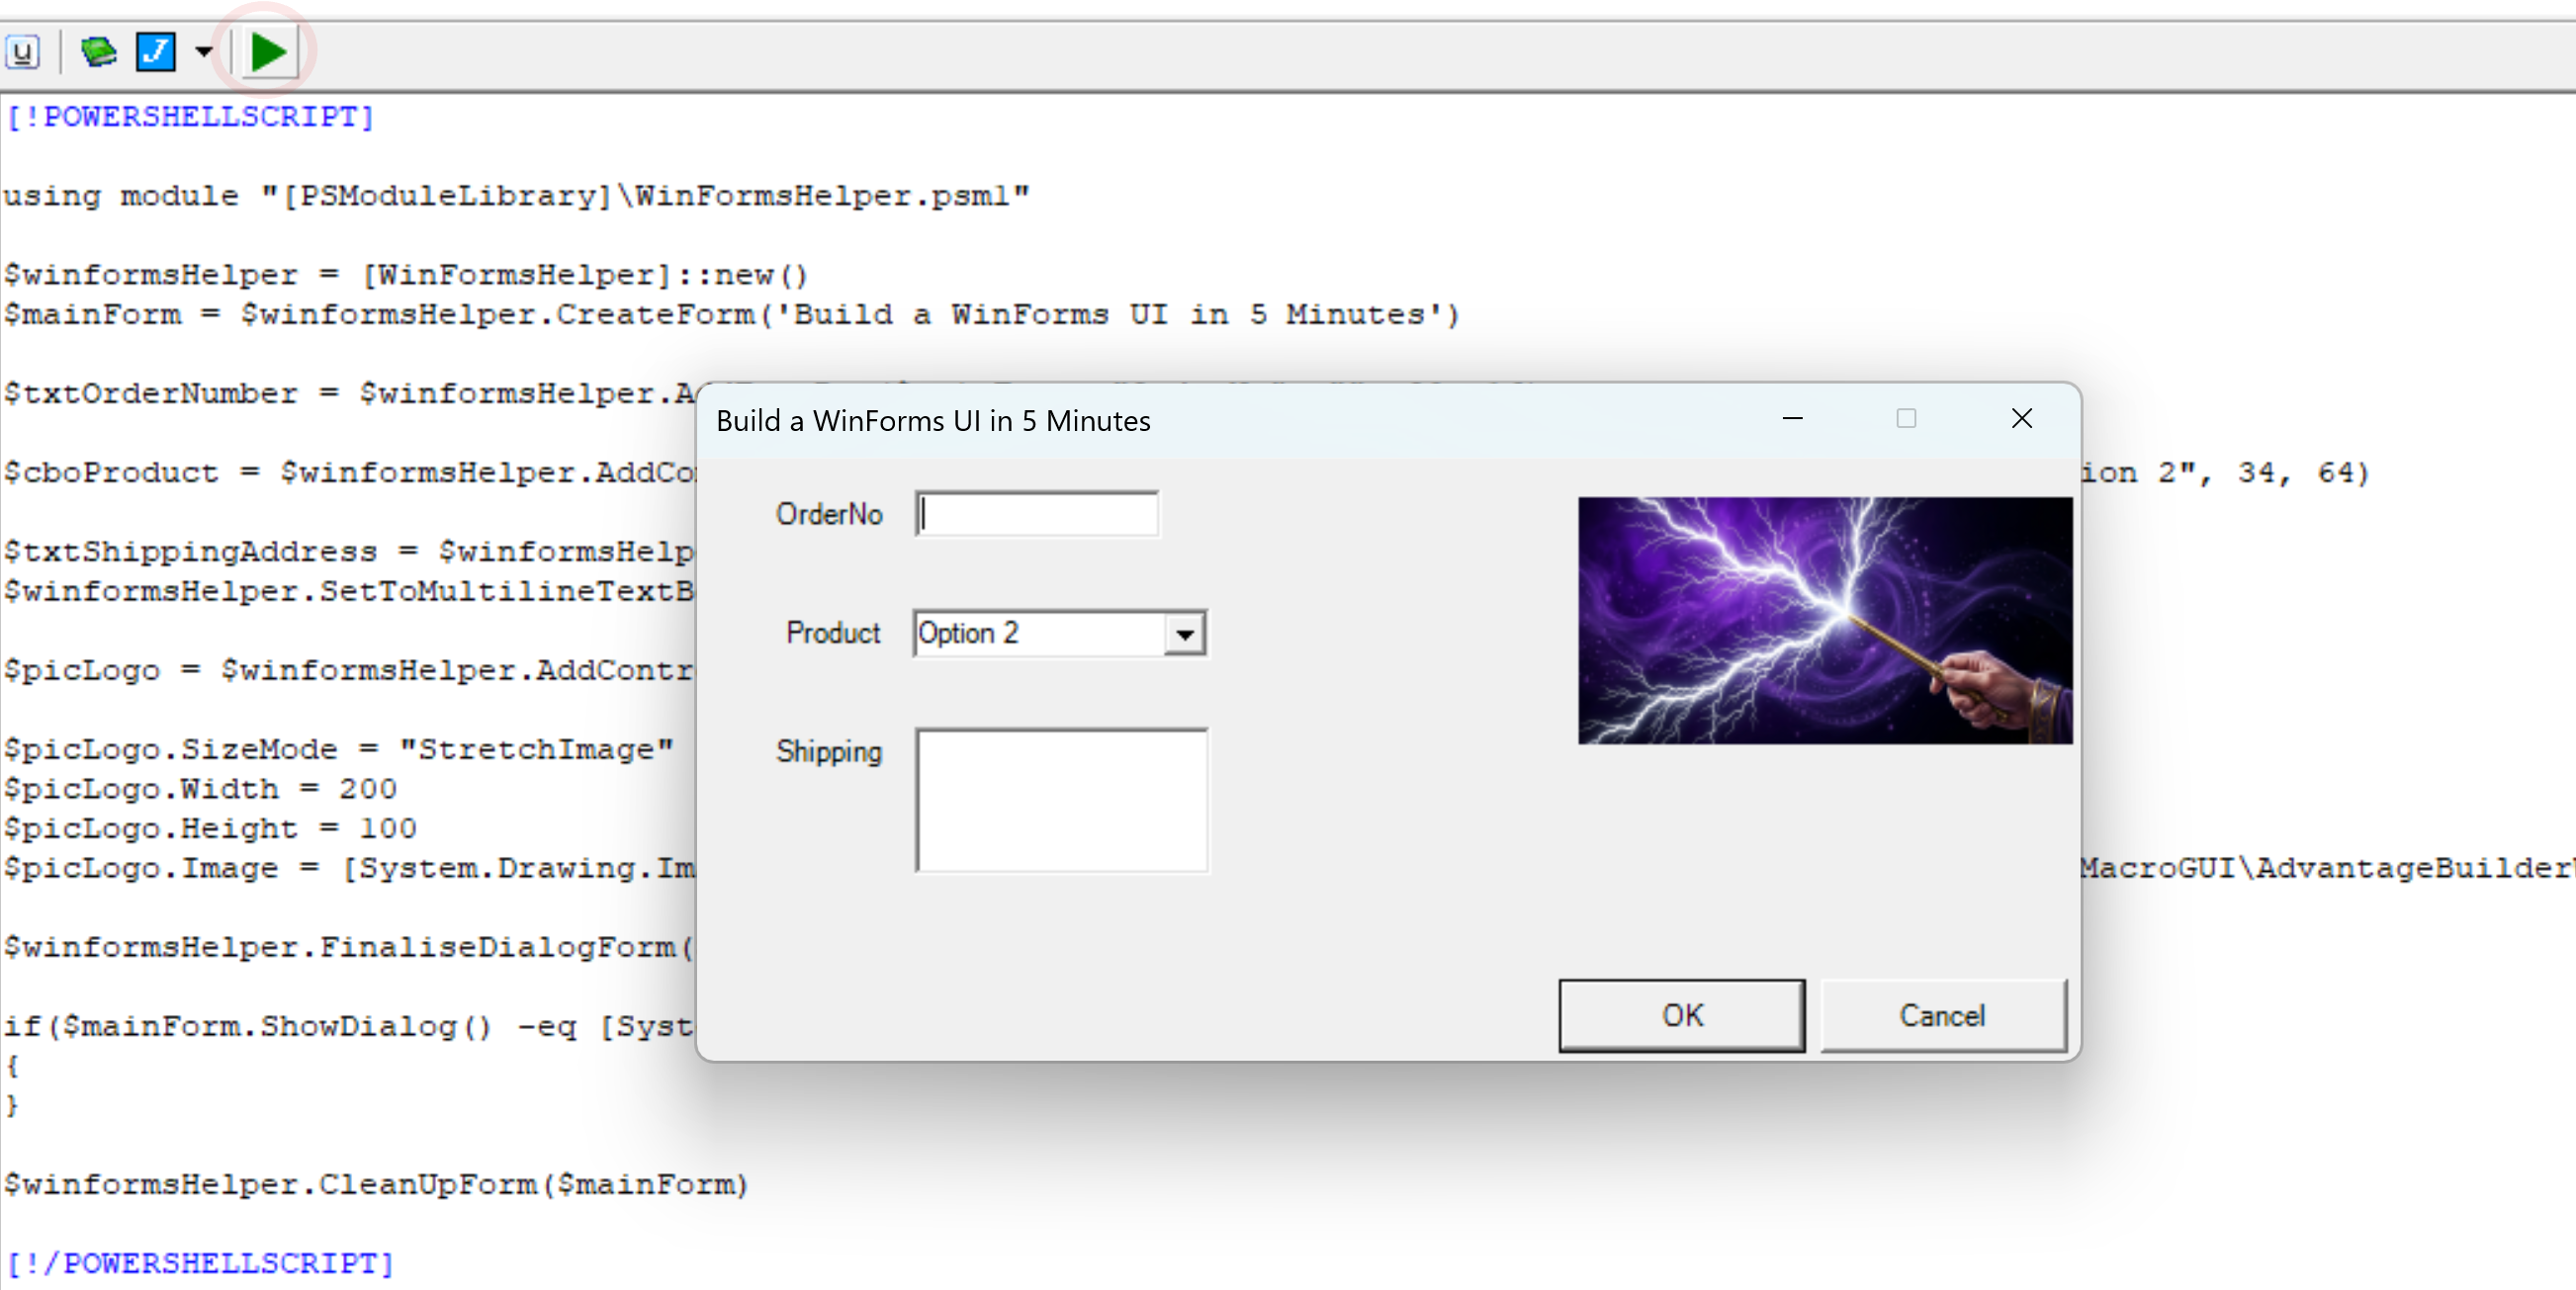
Step 1 — Insert the WinForms Boilerplate
Before adding controls, your macro must include the WinFormsHelper setup. Choose the boilerplate for your scripting engine:
PowerShell
using module "[PSModuleLibrary]\WinFormsHelper.psm1"

$winformsHelper = [WinFormsHelper]::new()
$mainForm = $winformsHelper.CreateForm('Form Title')

# add control(s) statements

$winformsHelper.FinaliseDialogForm($mainForm)

if($mainForm.ShowDialog() -eq [System.Windows.Forms.DialogResult]::OK)
{
}

$winformsHelper.CleanUpForm($mainForm)
JavaScriptV8 / JScript.NET
var winformsHelper = eval(getSourceCode('WinFormsHelper', 'Macro Main Helpers\\Library', 'WinFormsHelper'));
var mainForm = winformsHelper.CreateForm('Form Title');

// add control(s) statements

winformsHelper.FinaliseDialogForm(mainForm);

if(mainForm.ShowDialog().ToString() == "OK")
{
}

winformsHelper.CleanUpForm(mainForm);
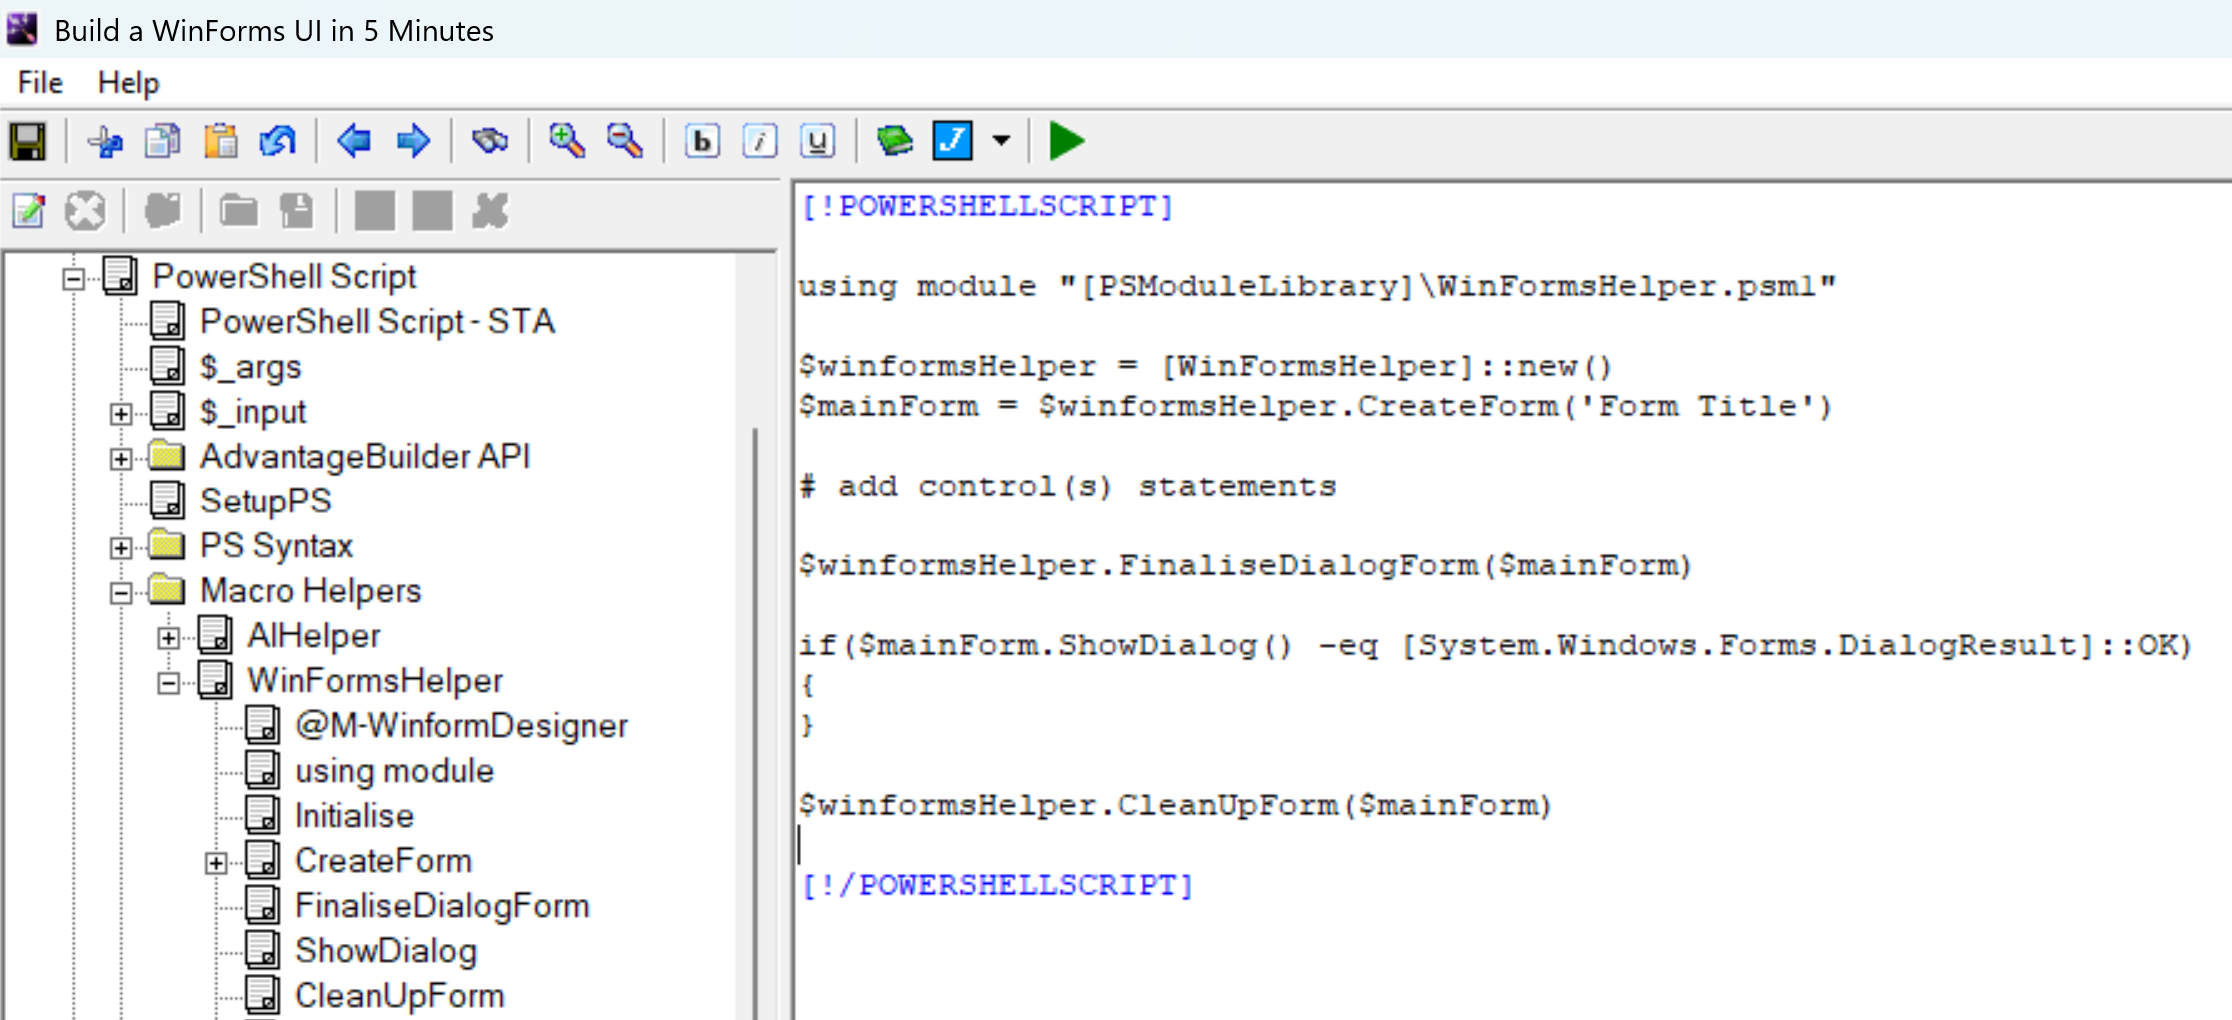
Step 2 — Launch the WinForms Designer
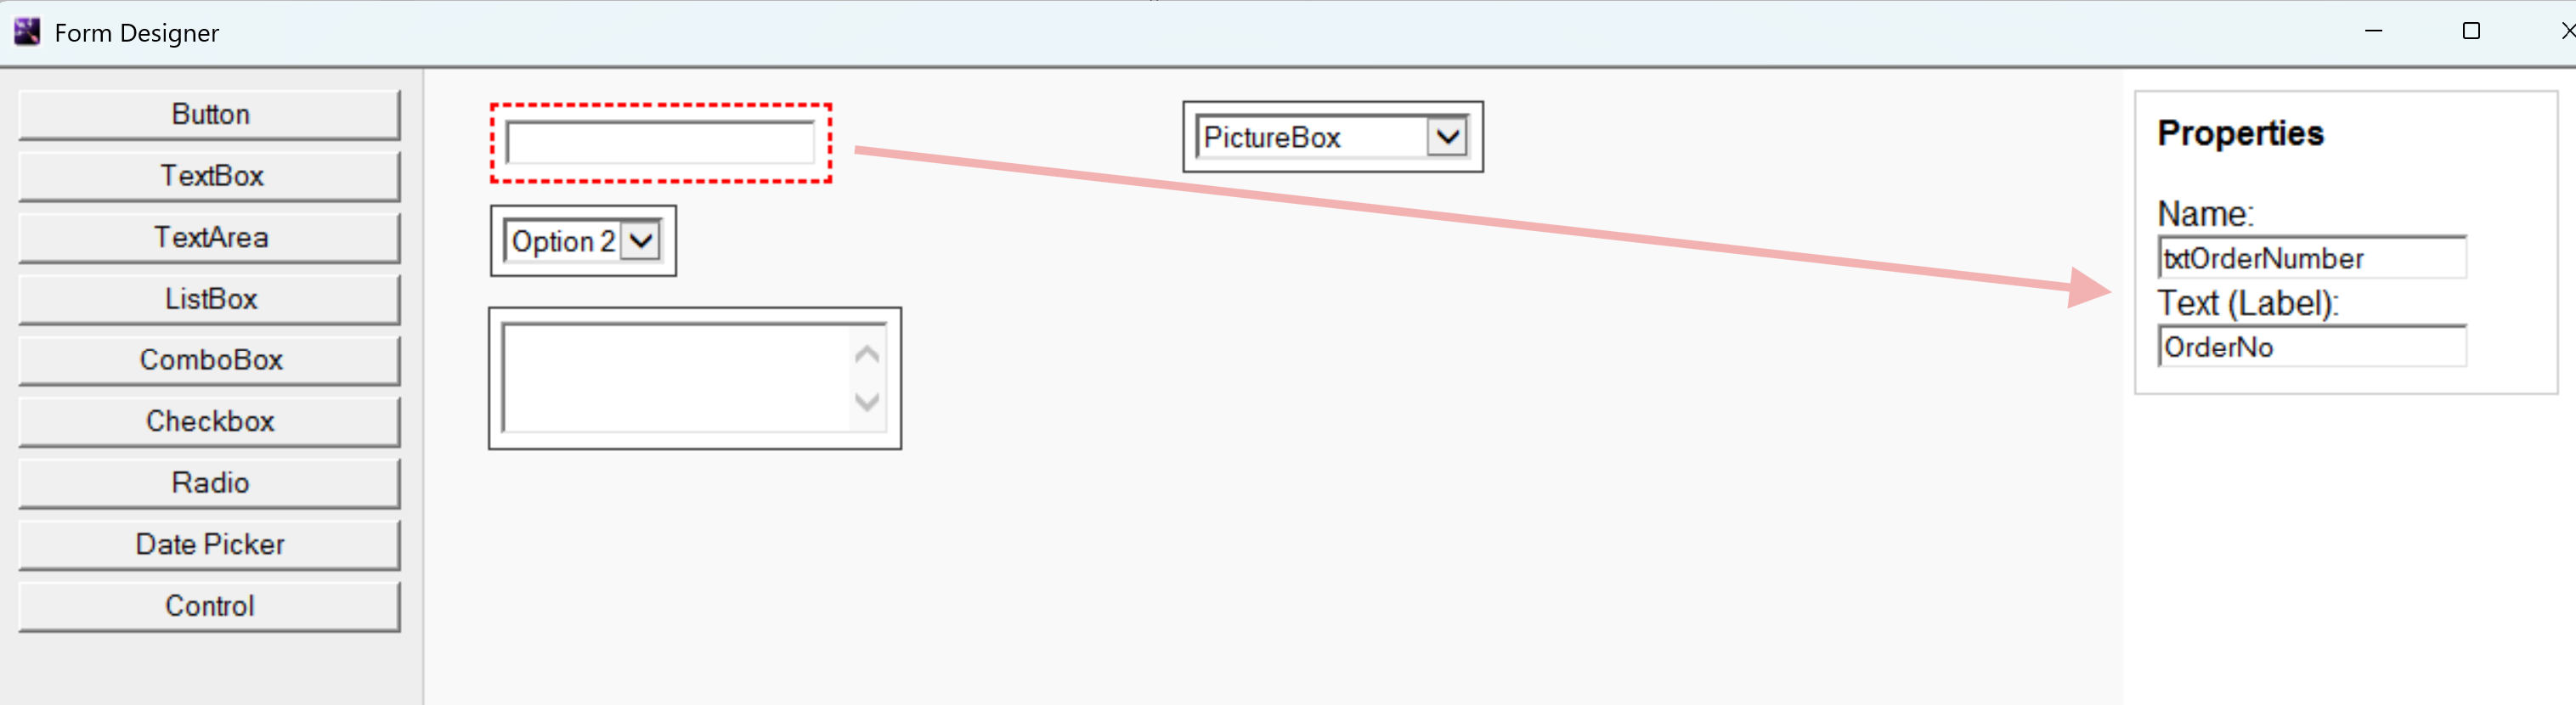
Use the Smart Menu System to run the WinForms Designer Helper Macro. This opens the visual designer where you can drag, drop, rename, and configure controls.
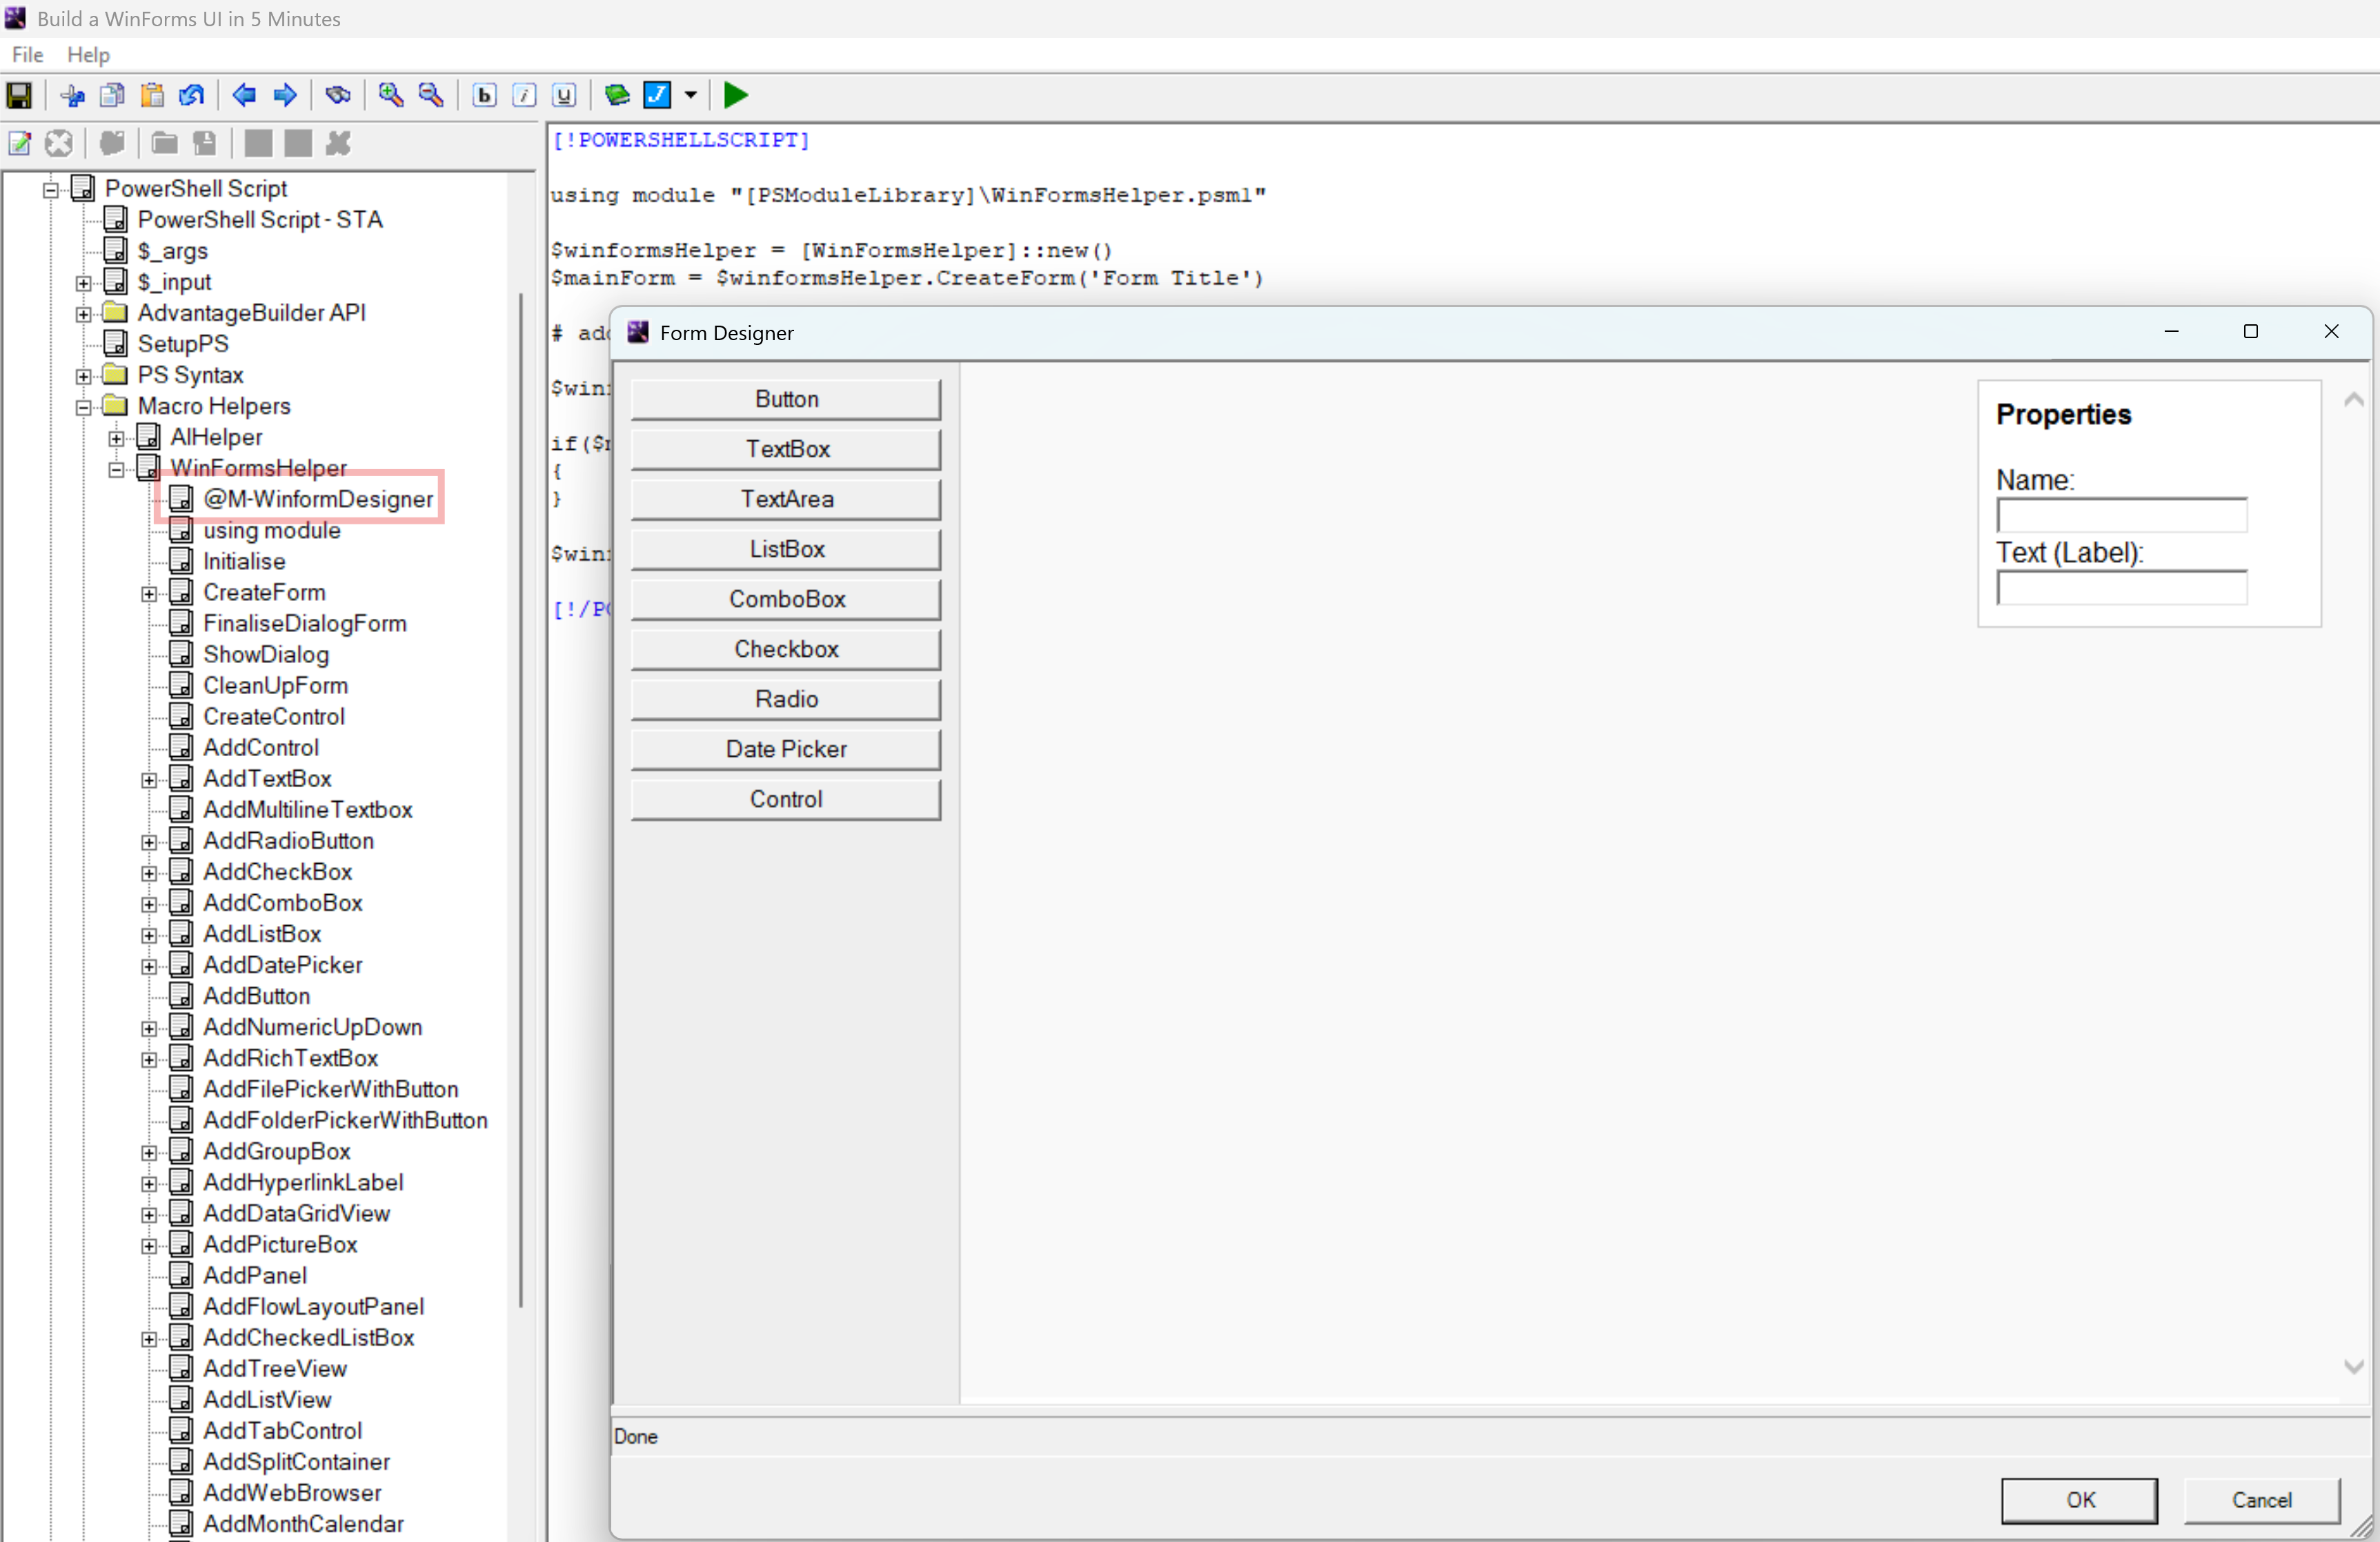
Step 3 — Add Controls Using the Toolbox
The toolbox includes common controls such as Button, TextBox, TextArea, ListBox, ComboBox, Checkbox, Radio, and Date Picker.
The new Control dropdown lets you add any supported WinForms control:
- NumericUpDown
- RichTextBox
- GroupBox
- DataGridView
- LinkLabel
- PictureBox
- Panel
- FlowLayoutPanel
- CheckedListBox
- TreeView
- ListView
- TabControl
- SplitContainer
- WebBrowser
- MonthCalendar
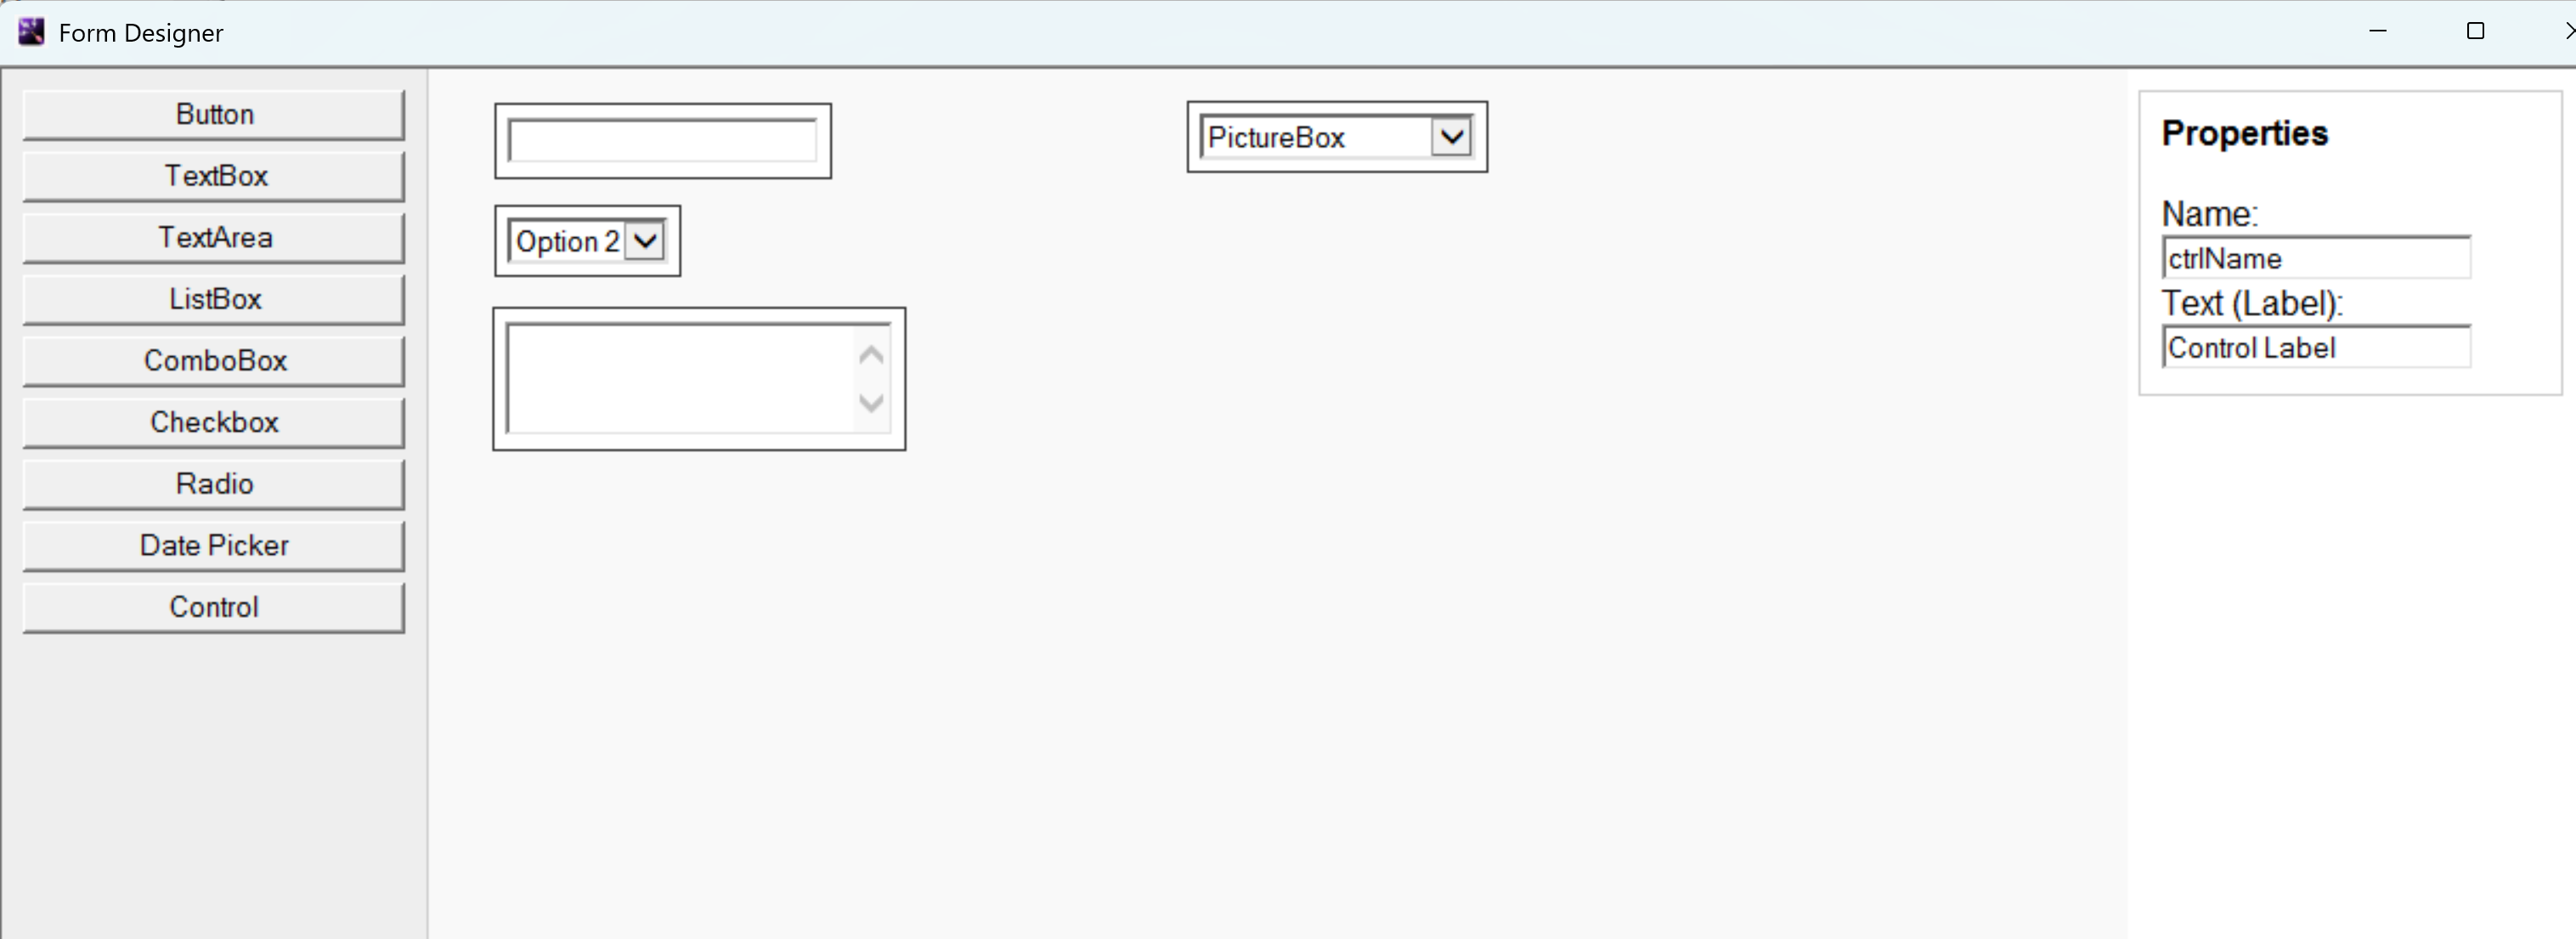
Step 4 — Edit Control Properties
Click any control to edit:
- Name (used in generated code)
- Label/Text
- Position (drag-and-drop)
Press Delete to remove a control.
Step 5 — Insert the Generated AddControl Code
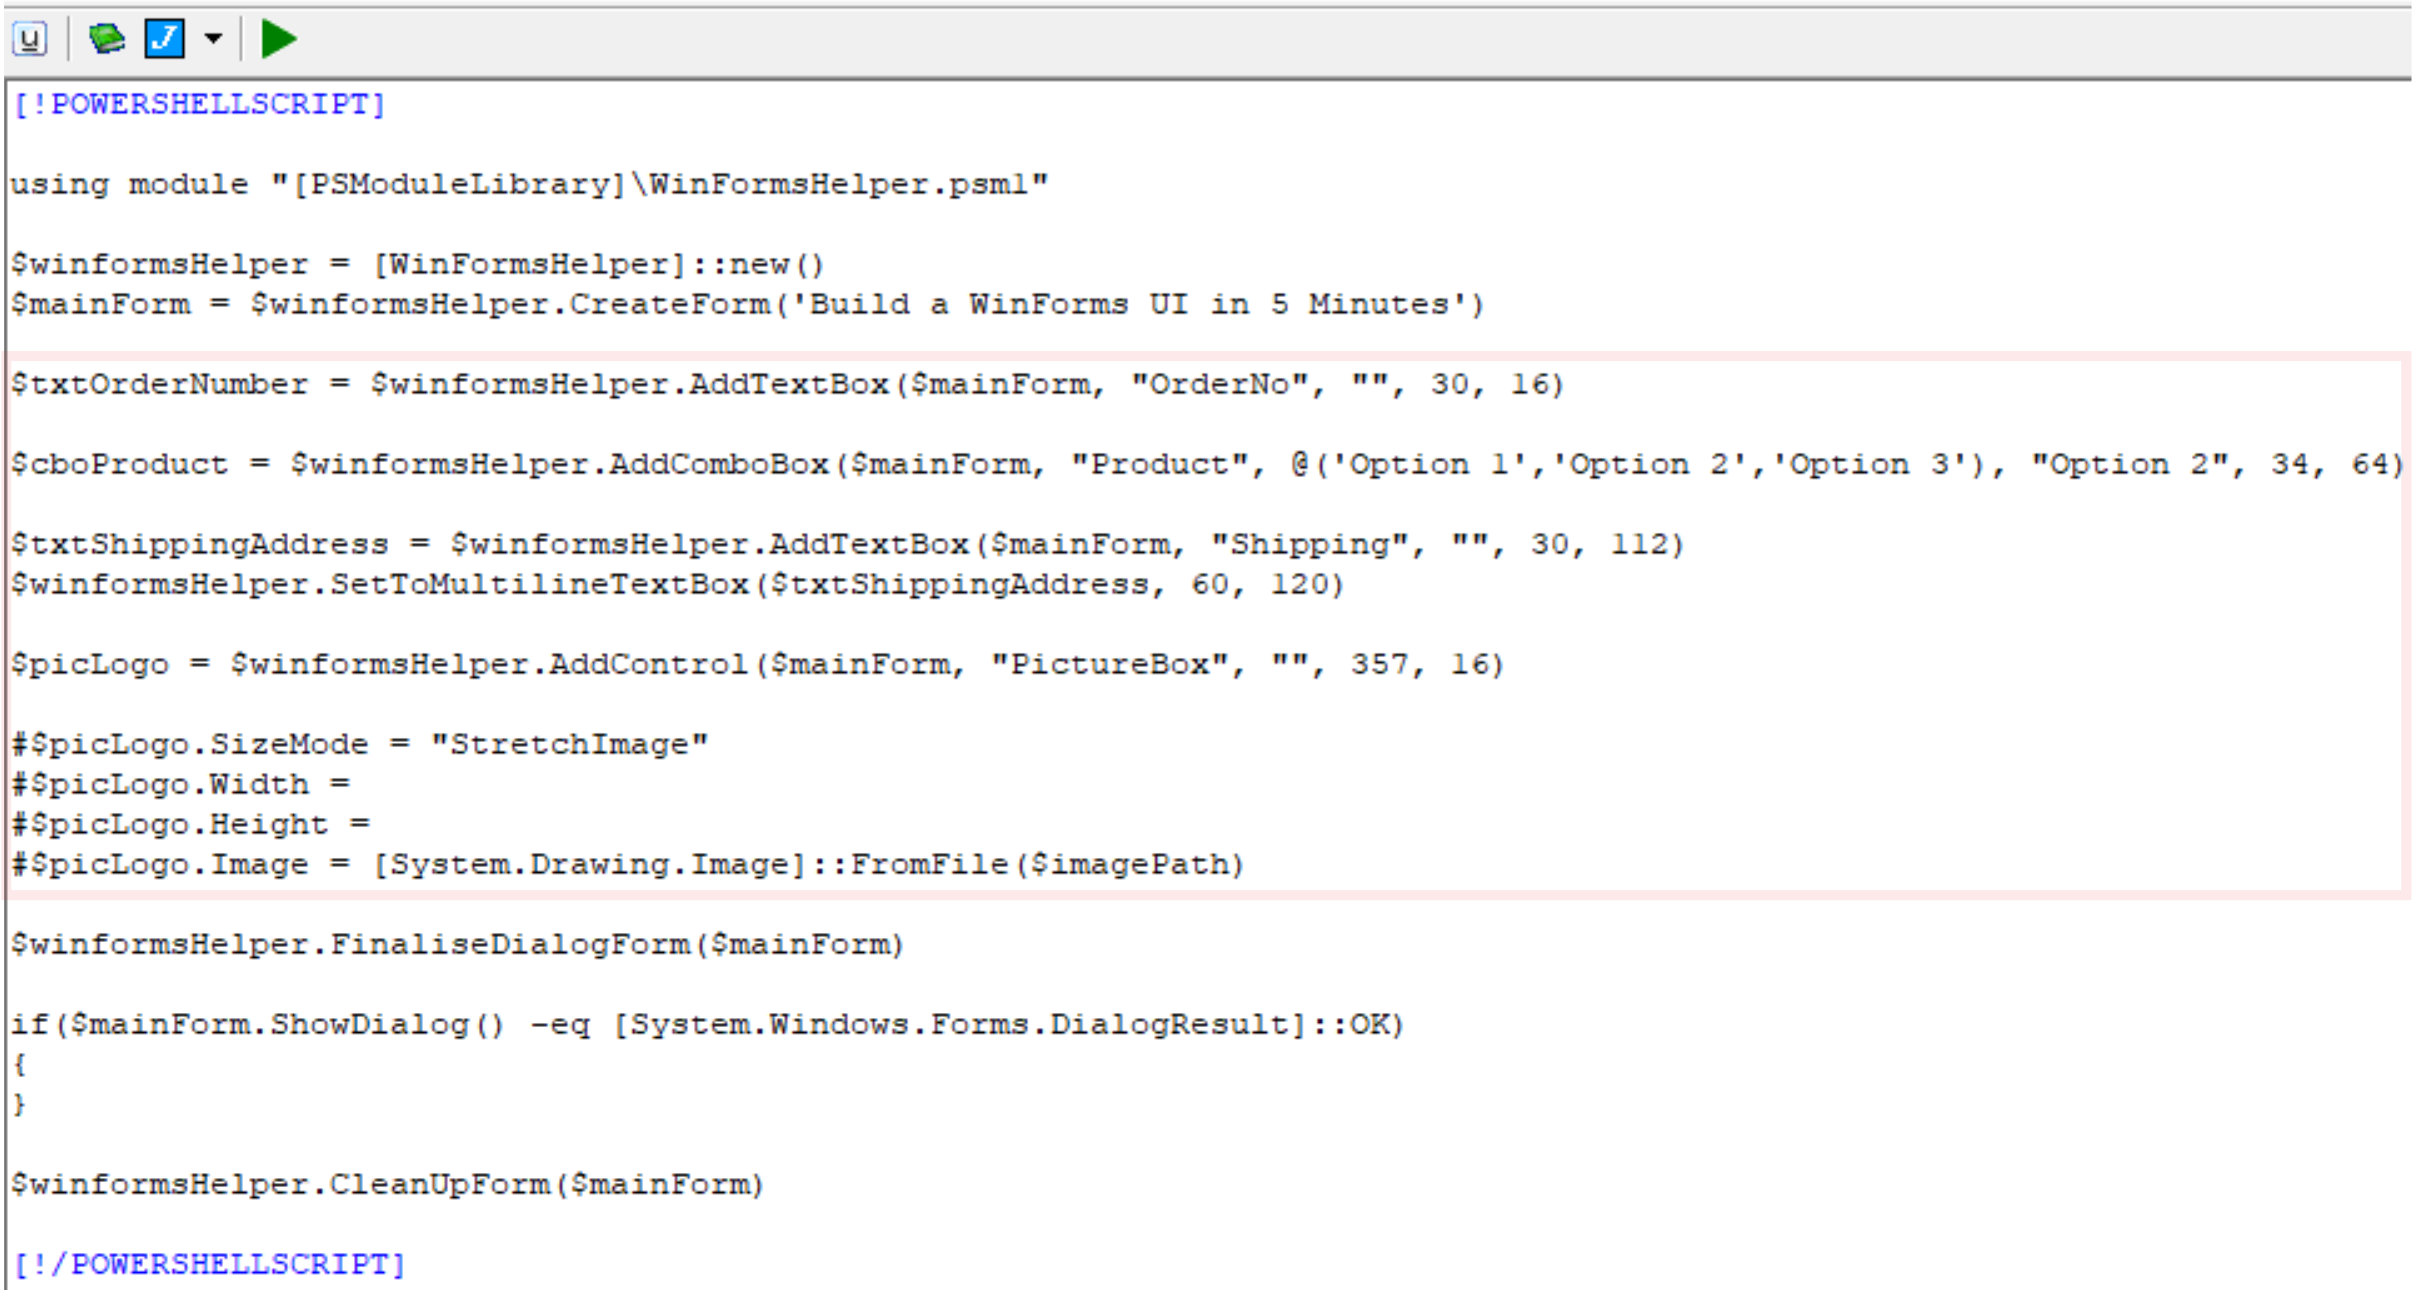
When you close the Designer, AdvantageBuilder generates engine-specific AddControl statements.
Example (PowerShell)
$btnSubmit = $winformsHelper.AddButton($mainForm, "Submit", 50, 50)Example (JavaScriptV8)
var btnSubmit = winformsHelper.AddButton(mainForm, "Submit", 50, 50);Advanced controls include a commented template showing recommended properties and engine-specific differences.
Step 6 — Run Your Form
Run your macro. Your WinForms UI appears exactly as designed.