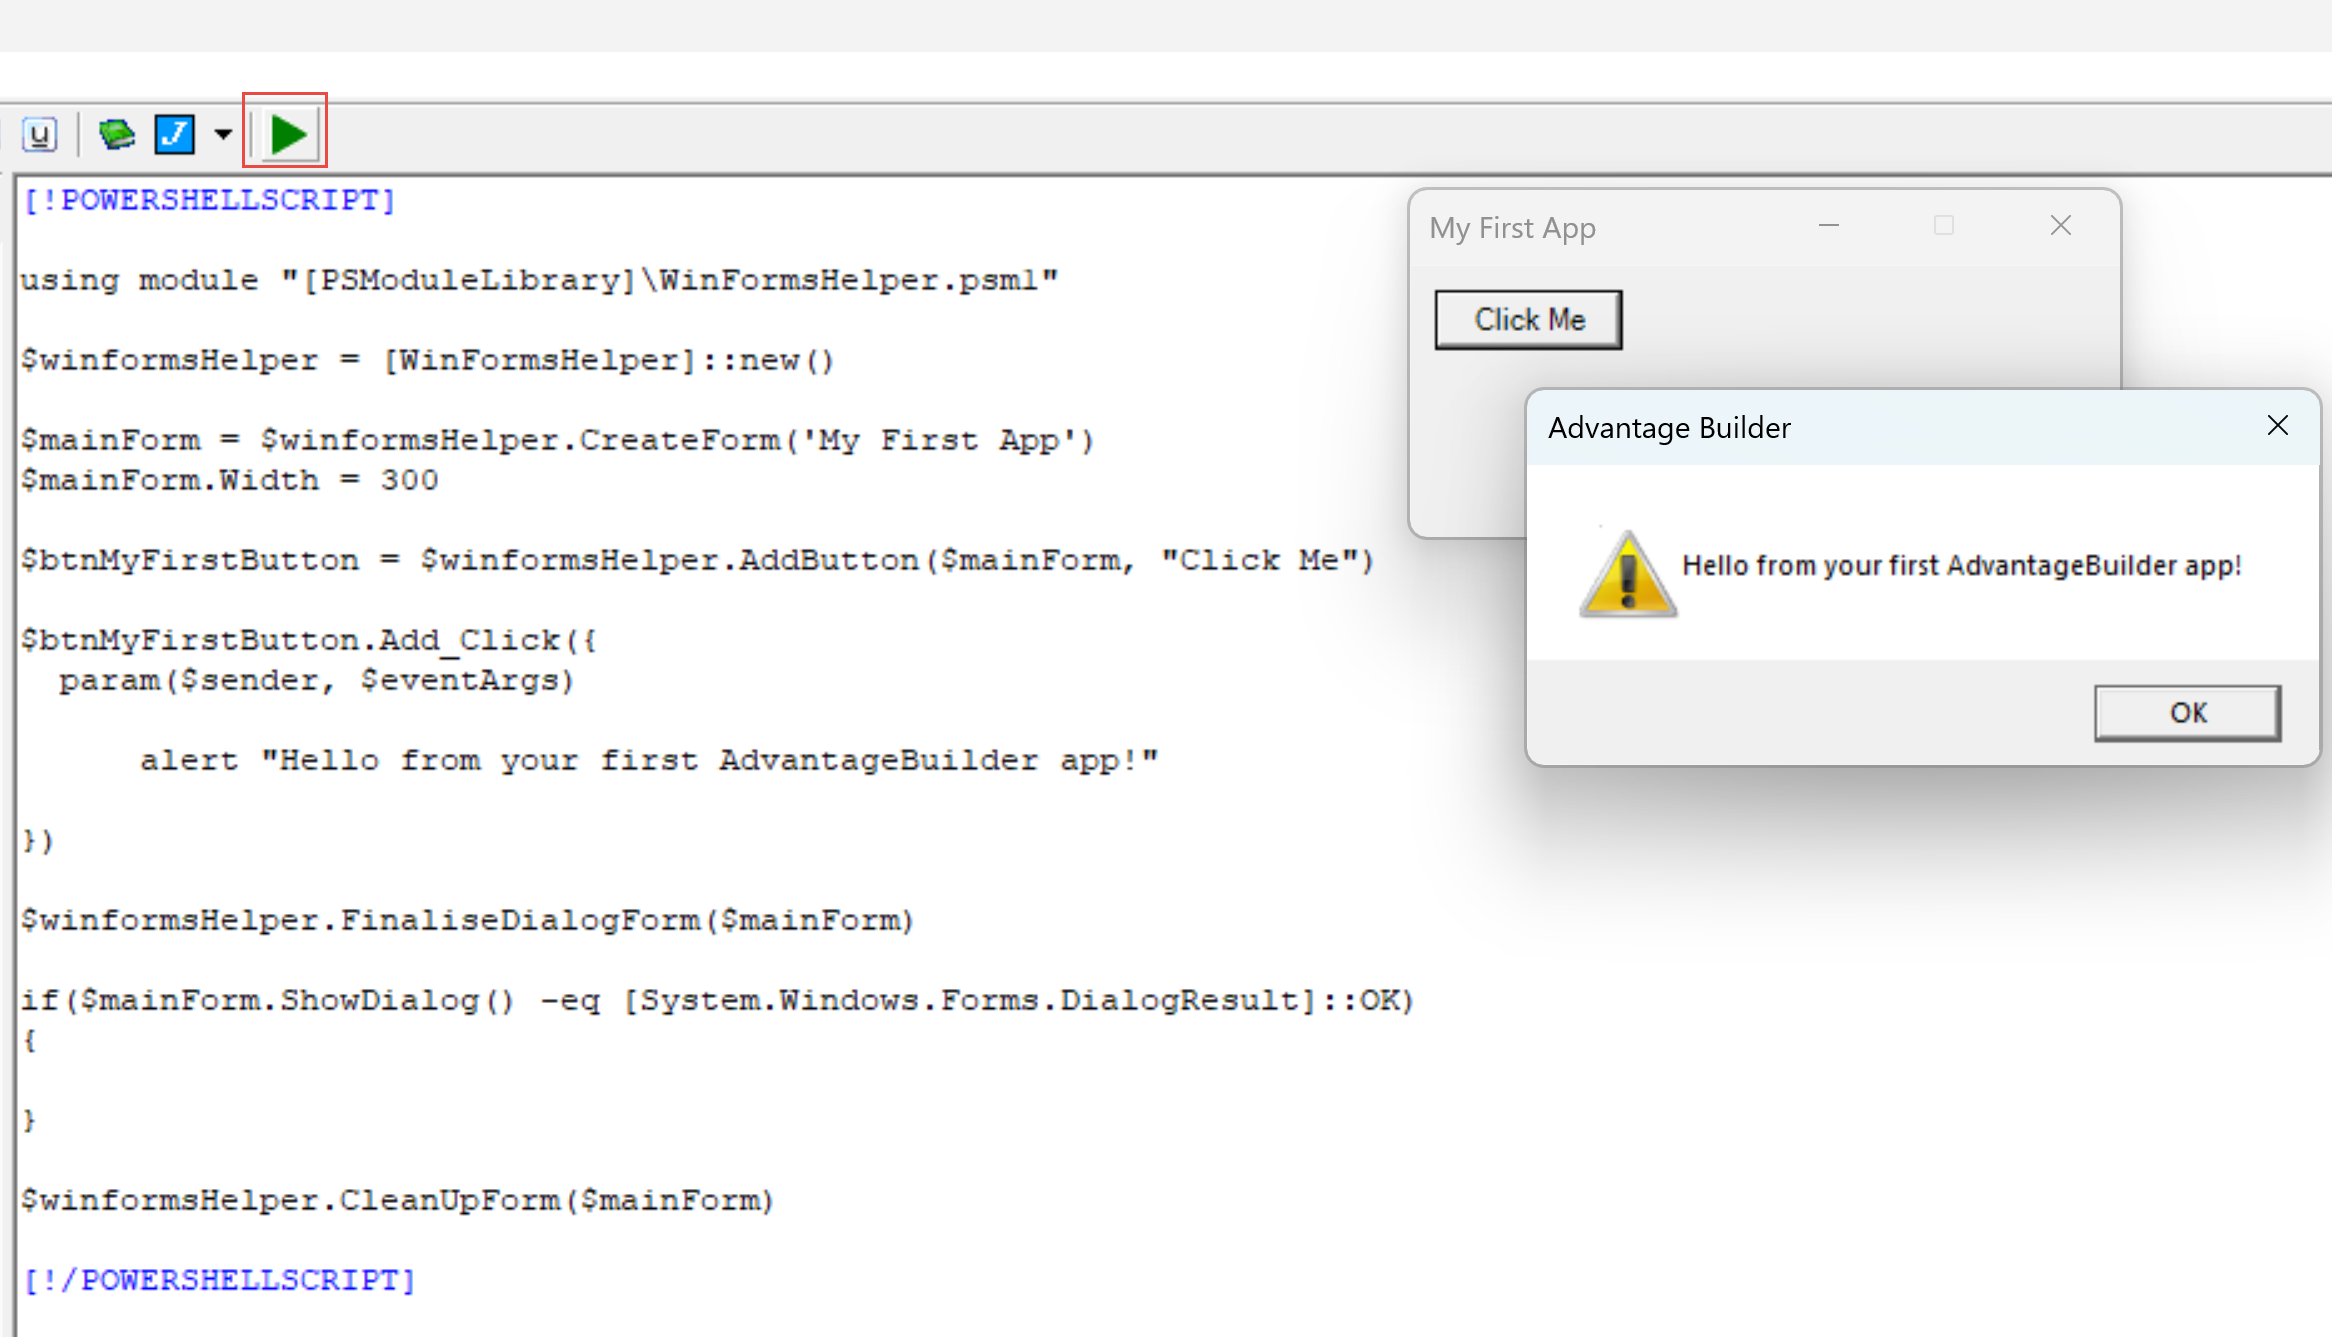
Step 1 - Create a new macro
You can create a macro in two ways:
Option A - Toolbar (recommended)
Click New Macro on the toolbar. A dialog appears asking for a macro name. After naming it, the Macro Editor opens and the Run button is available immediately.
Option B - File menu
Click File - Create Macro. The Macro Editor opens with an unnamed macro. The Run button is hidden until you save. When saving, you will be prompted to enter a macro name.
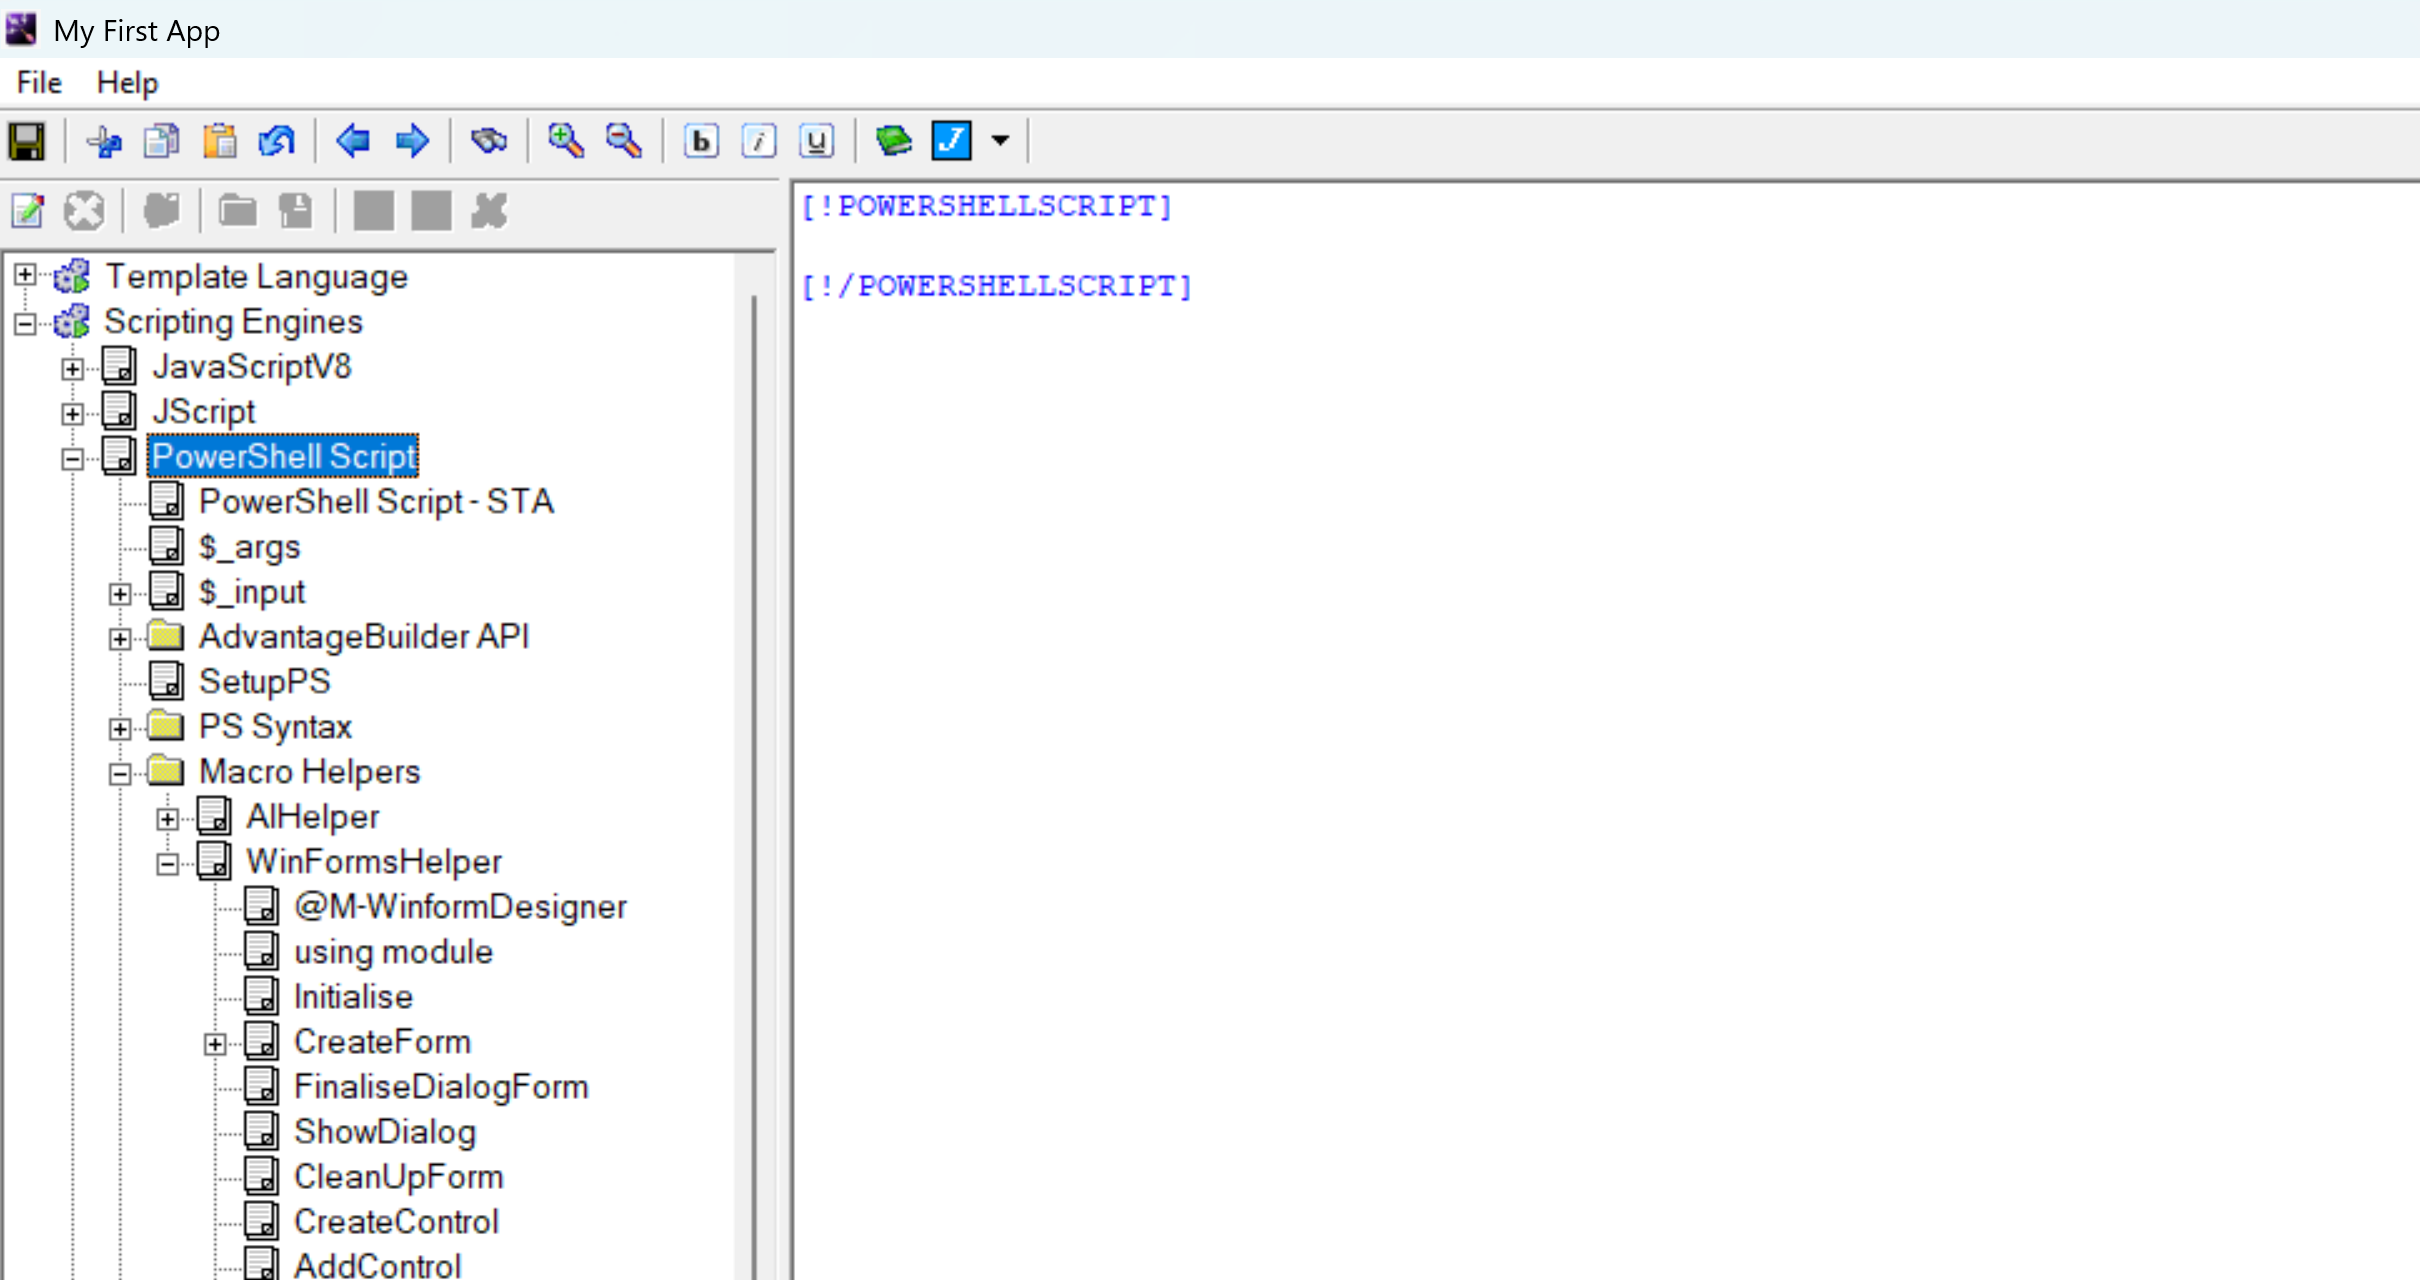
Step 2 - Add a UI control
AdvantageBuilder lets you add controls using the Smart, Extensible, Point-and-Click Menu System on the left side of the Macro Editor. This menu is a hierarchical tree that works the same way in every scripting engine.
You can add controls in two ways:
Option A - Add a specific control
Expand Macro Helpers, then WinFormsHelper, and click the control you want to add (such as AddButton, AddTextBox, AddComboBox, etc). AdvantageBuilder inserts the required code into the editor automatically.
Option B - Use the WinForms Designer Helper Macro
In the same menu, click @M-WinformDesigner. This launches the visual designer, allowing you to place controls on a form using point-and-click layout. When you finish, the designer generates the code for you.
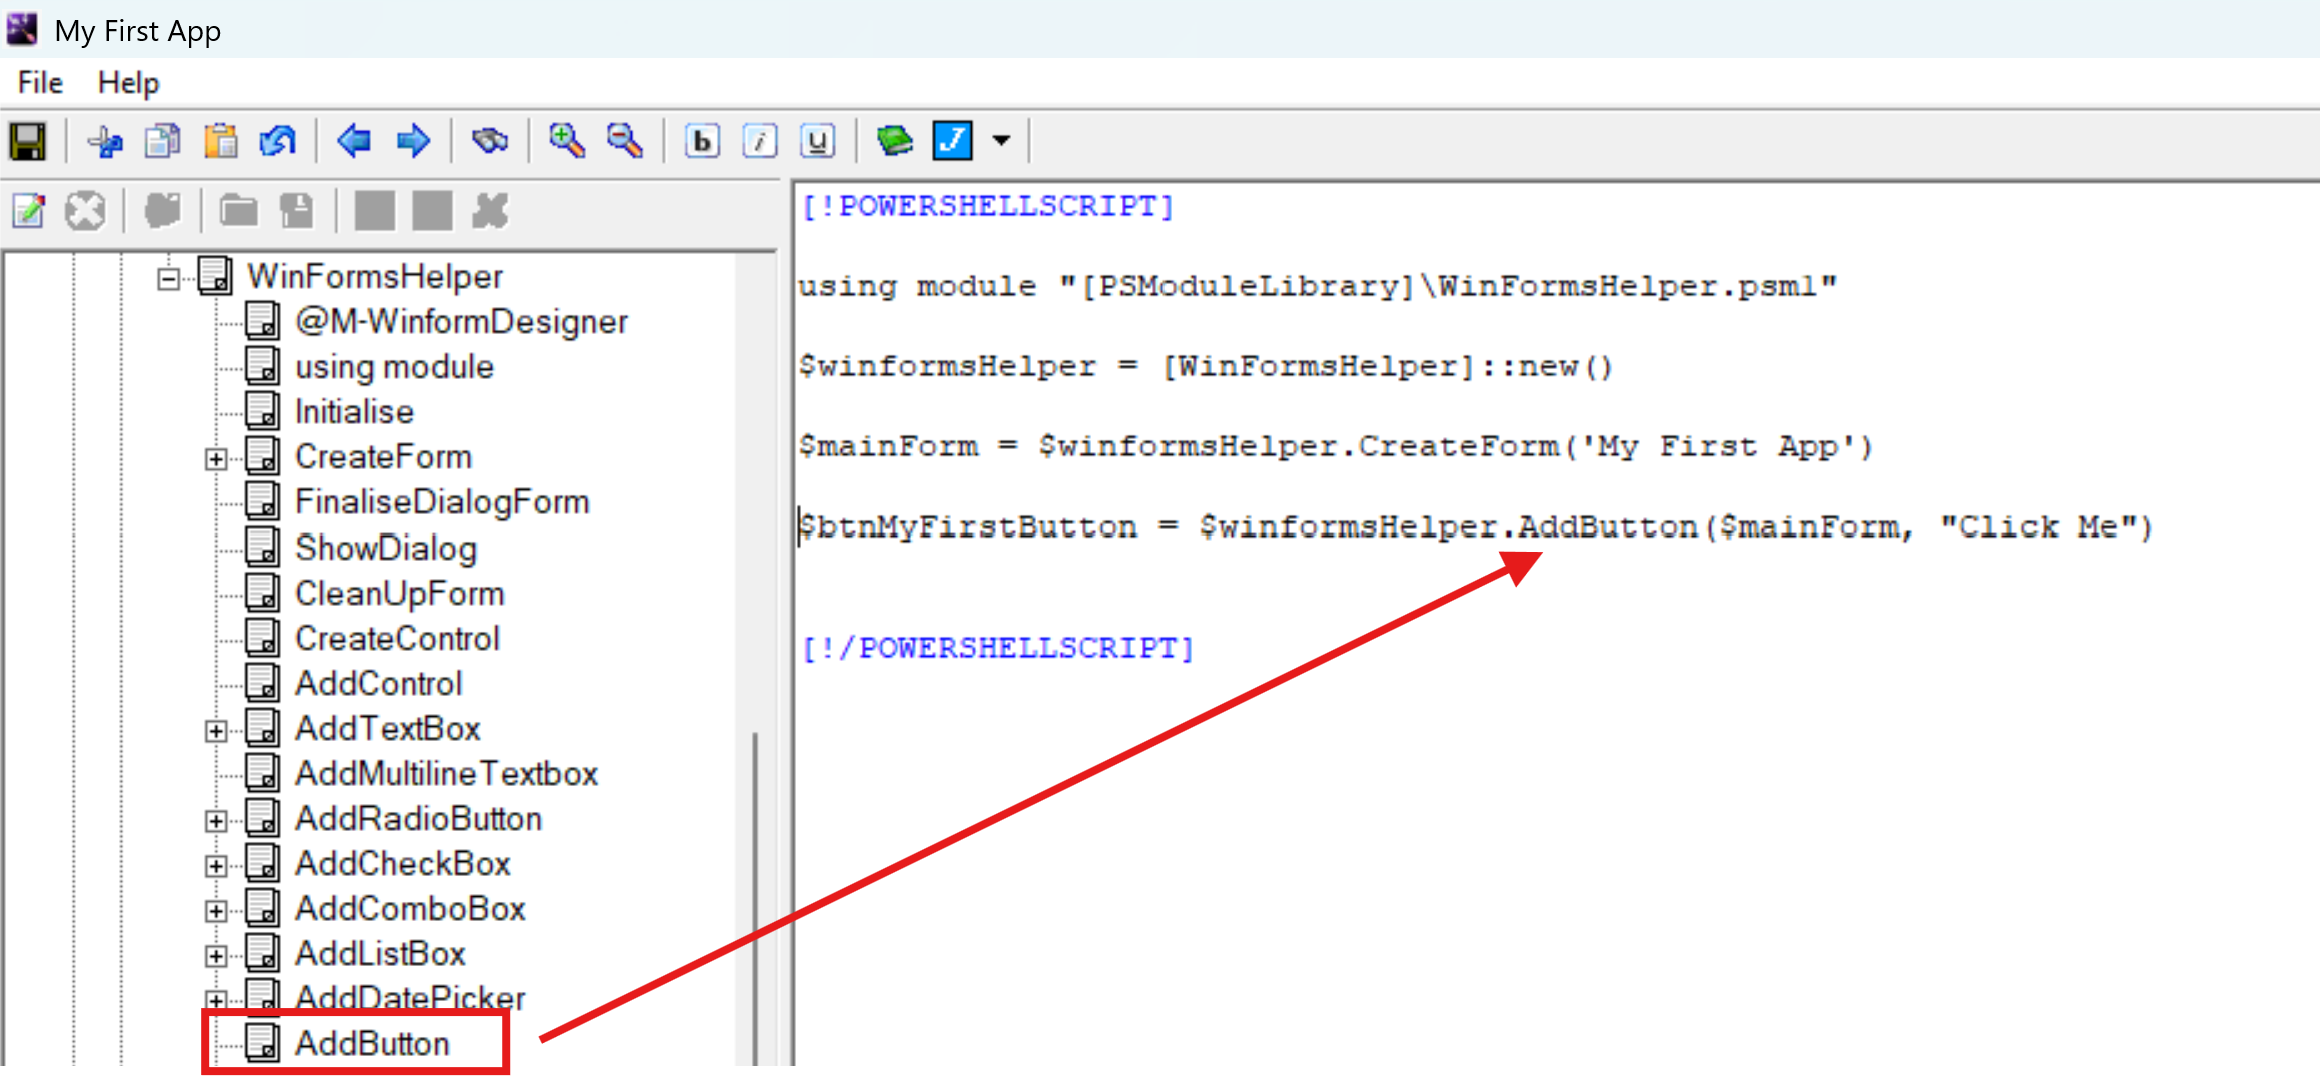
Step 3 - Insert your first script action
The Smart, Extensible, Point-and-Click Menu System on the left side of the Macro Editor is a hierarchical tree of actions. Clicking a node inserts code into the editor on the right.
Some nodes insert static code. Others run helper macros that generate code dynamically. Either way, the code appears instantly without typing.
For example, you can insert a simple message box action:
alert("Hello from your first AdvantageBuilder app!");
The menu system is fully extensible, and you can add your own nodes or helper macros.
Step 4 - Save your macro
Click Save. If the macro is unnamed, you will be prompted to enter a name. After saving, the Run button becomes available.
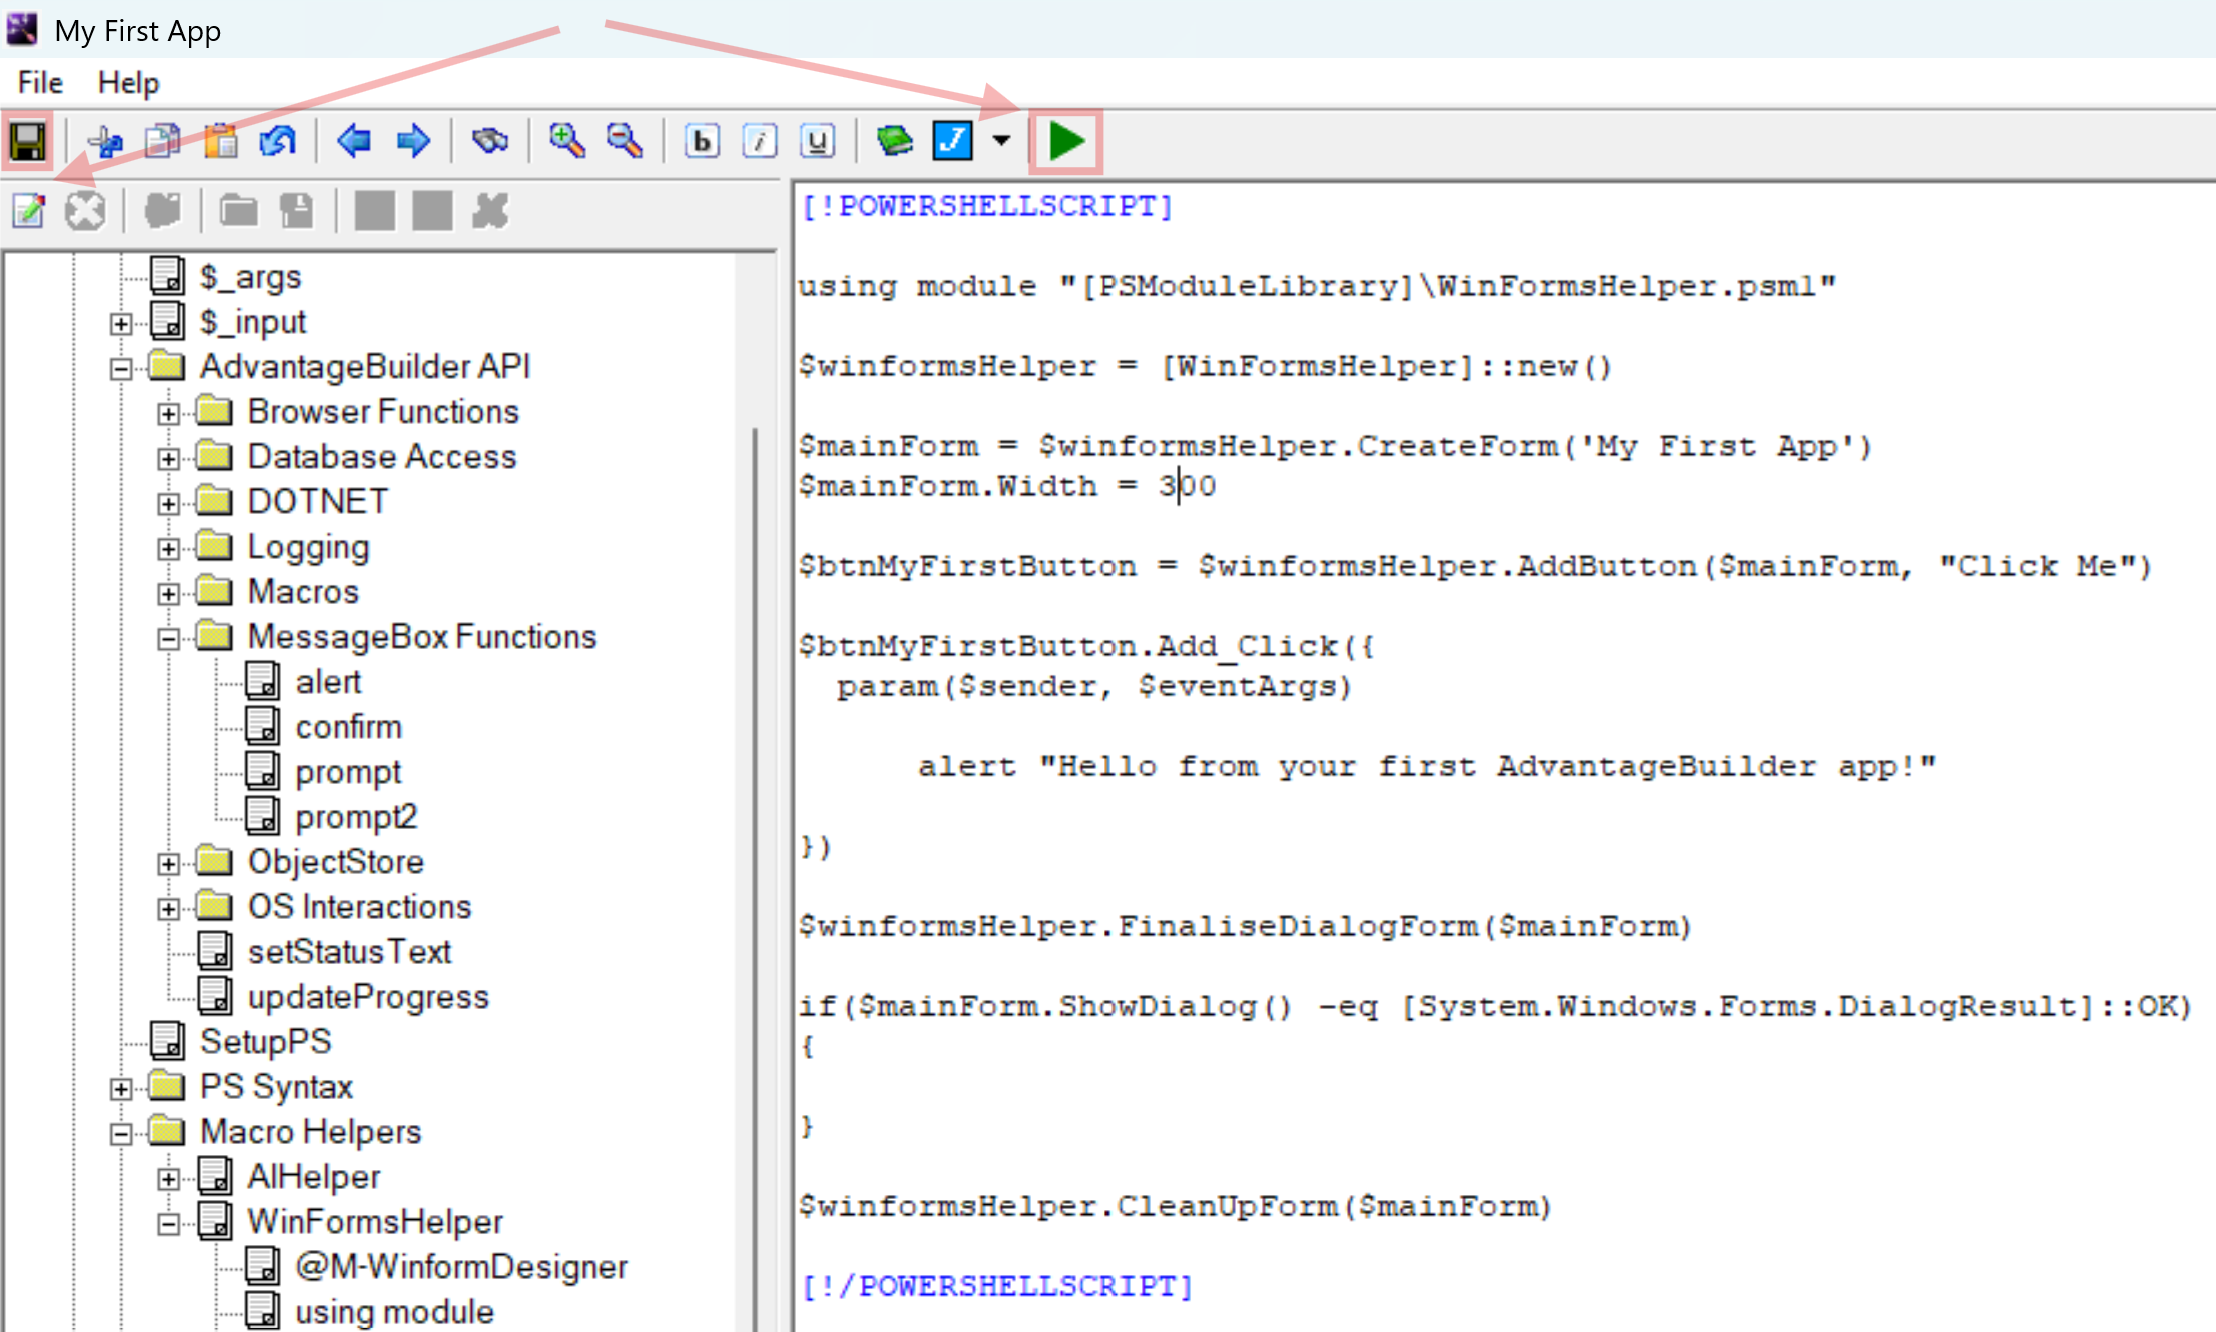
Step 5 - Run your app
Click Run. Your new app launches instantly with UI and script logic.